Stuffing is both a physical act and a substance (or a verb and a noun).
In this article we will deal with the verb.
Stuffing techniques depend on what kind of object you are stuffing. If you stuff a pillow you would want a stuffing fiber that has more loft and would stuff it so it has more give Stuffing a bear requires a stuffing that has more compact ability as well as stuffing harder.
I think my first experience, as a child, was stuffing a chicken with a bread crumb dressing! My Mother would let me spoon the mixture into the unbaked chicken's cavity. After a couple bobbled spoonfuls I resorted to my hands. Then it was a matter of packing it in, like sand in a pail. Or so I thought!
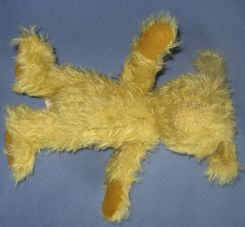
Stuffing a bear is a similar action with just a little more thought and planning required. Just different tools and lots of elbow grease!
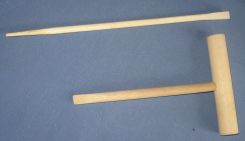
The tools I like to use are wooden chopsticks for small bears and chisel shaped wooden stuffing tools with T-handle for larger bears. I have seen bear makers use pencils and screwdrivers and even scissors. Wooden tools are less likely to poke through a paw pad or mohair.
First determine the posture you want your bear to have. Is its body language critical to the finished product? Upright and firm is my favored choice- especially for dressed bears. Not only do garments hang much nicer and look better overall but the bear retains its shape longer.
My second choice for a stuffing technique is called "Schlumpy Dumpy". It's an industry term (or at least MY industry term). This type of stuffing makes the bear's tummy soft and yielding. There are various degrees of how soft to stuff a tummy. End results vary with the type of stuffing used (see my article called "Stuffing- the Noun" the link is below), how pliable the mohair is and how big the bear is. This type of bear is usually meant to sit and have a relaxed, slouchy posture.
 In any case, which ever posture you choose, all bears start with stuffing the head which must be done before jointing. In any case, which ever posture you choose, all bears start with stuffing the head which must be done before jointing.
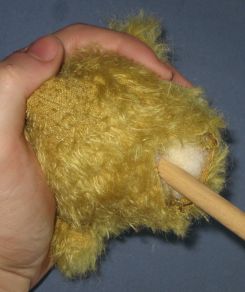
The nose is the focus of the head when stuffing. It will take much abuse from embroidering so it is critical to have a firm foundation upon which to work.
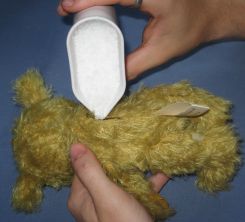
Start with small pieces of a firm packing fiber-fil, relative to the size of the bear and rolled into soft balls.
Stuff from the very tip of the nose distributing evenly and packing firmly as you go. Add additional fiber-fil into the snout area molding the outside shape with your other hand.
Check the shape continually to make sure it's smooth and even. At this point I distribute larger pieces of fiber-fil around the inside of the head to start filling it in. Add more, packing it down tightly after you are sure the shape is pleasing and rounding out uniformly. Make sure the nose stuffing stays in place. Stuff to within 3/4 of an inch from the neck edge.
Now the bear should be jointed.
I also like the tips of my paws and feet to be hard stuffed. This is so that when you embroider the claws onto them the stitches lay on the surface and don't get sucked down into the fabric and collapse the tip.
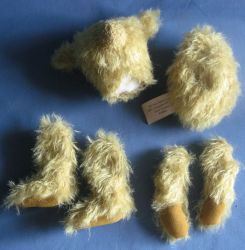
I usually hard stuff all arms and legs and some of my bigger bears may have pellet filled arms for pose ability or soft stuffed arms that are wired and pose able.
All start with hard stuffing in the very tips and continue upward, rounding out hips and tops of arms before packing the area around the opening as its sewn shut with a ladder stitch.
Last is the body. There are a variety of combinations of stuffing and pellet fillings to give different results depending on the body posture desired. I prefer to add some weight to all my bear's bodies.
 In bears over 8" I use plastic pellets poured into the body cavity before any stuffing is put in. In bears over 8" I use plastic pellets poured into the body cavity before any stuffing is put in.
This will put the center of gravity where the bear needs to sit.
In bears under 8" I use steel shot or BB's. Add fiber-fil on top of what ever pellets you may or may not use, in small pieces packing down as you go. Tricky places to stuff are between the legs, under the chin and around the head joint.
Continue to pack down for a hard stuffed firm body until no more will fit and close with a ladder stitch.
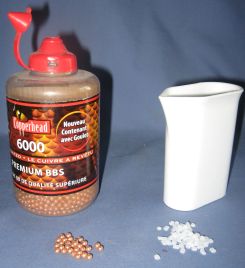
To achieve the "Schlumpy Dumpy" effect I use lots of pellets, at least half the body full, and just enough fiber-fil to round out the body shape and fill the opening so pellets don't leak out.
I once had a bear that developed a leak when sent out for photos. The photographer called to report the bear was a Hemophiliac! I was able to mend him with just a few stitches and my quality control check ratchet up a notch.
Small bears take some different treatment but the same techniques. I use much smaller pieces of fiber-fil and prefer a firm pack product with weight such as the new Bamboo fiber from Fairfield. There is more density and pack ability which gives small bears just a bit more heft. I also use BB's or shot glass pellets which have a nice feel but not enough weight for the really small pieces.
Go slow when stuffing and pay attention to critical areas until you have mastered these techniques. You will achieve a professional look and a bear that will hold up over the rigors of time.
Happy Bear Making!

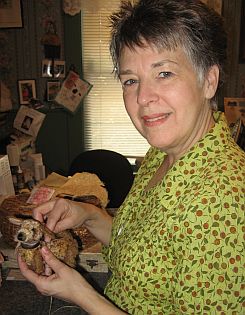
Cindy McQuire
China Cupboard Bears
Member Since March 2005
Article 1: Stuffing 101: The Noun
Article 2: Stuffing 101: The Verb |

 3428 Hillvale Road