 |
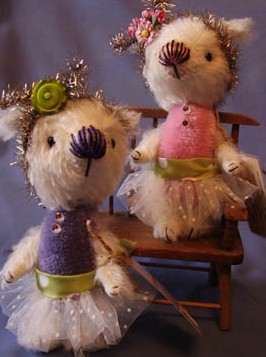
Opal & Opaline
8" tall, $165 each plus shipping.
|
At the Beginning
When I first started in the Teddy Bear world, I was a bit like a fish out of water.
With the resurgence of antiques and Americana, traditional bears were all the rage.
“Handmade in America” swept
the nation and and artists like
Sue and Randy Foskey, the Van Houttens, Bev White, and Ted Menton ruled the roost.
Vintage and antique were the mantra.
Cindy on the Scene
I entered the teddy bear scene through the back door- doll
shows.
At the time I collected antique
dolls and when my collection outgrew the space I available,
I began to sell some at local doll shows.
I soon sold the antiques I had, yet still wanted to participate
in doll shows so I could arrive early, get dealer prices and buy
and sell, before the general public even came through the door.
However, I needed merchandise to sell so I started creating
soft dolls and bears. The dolls I made were soft bodied with
time-consuming, elaborate costuming.
 |
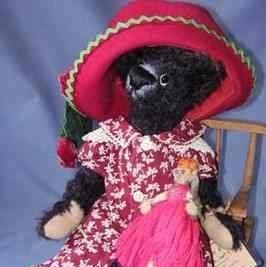
Annie
15" tall with vintage dress, hat, and doll, $245 plus shipping
|
 |
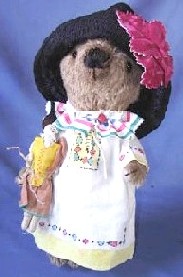
Abaih
10" Tall, $165 plus shipping.
|
 |
Ham Bone & Funny Bone
Ham Bone is 18" tall, $300 plus shipping. Funny Bone is 15" tall, $225 plus shipping.
|
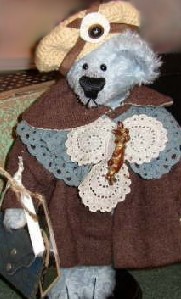 |
Bunny Blue
Cindy's signature look, 12" tall bear outfitted in lots of different textures and a fabulous color combination! OOAK. $275
|
Enter, the Bears!
My first bear making labors were just
so-so. They were well made from
commercial patterns using old coats,
linings and fake fur, (the retail market
for materials was very limited), but they
lacked individuality.
Much to my surprise, the teddy bears
started to sell. It seemed everyone
wanted one!
Most of the bears were embellished
with a small bit of vintage lace or a vest,
which was very similar to the efforts
of other bear makers at the time.
I hesitated to clothe my bears, though, because I was dissatisfied with how
traditional bears looked in clothing.
Birth of the First Pattern
I spent one whole winter designing
my own pattern. It was unlike
any traditional bear I had ever seen.
Instead of short, fat and round, my bear
was long limbed, thin waisted and more
of a doll proportion. It was meant to be dressed, which is really my forte.
What to Wear?
Dressing antique dolls was a side
line forced upon me by happenstance.
Many of antiques dolls are missing
clothing.
With my fashion design background,
recreating vintage costumes was
a delight.
HOWEVER! Dressing antique dolls
correctly has limitations. Ideally,
the fabrics, trim, buttons, pattern,
and even thread should be from
the same time period as the doll.
At times it can be very frustrating
to find fabrics and trim in correct
proportions and colors for a doll
as well as from the same time
period.
The Freedom of Dressing Bears
Bears have no such requirements!
It was like I was set free! I could
combine 1920’s fabric with new trim
and a 1950’s piece of jewelry on a bear.
When I discovered the wonderful world
of mohair, I found I could make teddy
bears in any color to combine with the
vintage fabrics I had.
It was with a lot of anxiety I showed my
first bears at a show. Although it took
a little while to catch on, they delighted
enough customers to get me started.
Today, much of what I do with my bears
revolves around how I embellish and
dress them.
Since that is also the focus of my regular
column, I am providing you with a FREE
pattern to create one of my original
doll- proportioned bears.
Then, you can use the ideas I give you
in each column, to add all those extra
touches that make your bear special!
Have fun making her and I would
suggest giving her a vintage-sounding
name.
Here’s a hint - check out the obituary
column or your local cemetery for ideas.
It may seem strange, but I feel it lets
the deceased live on, in the form of a bear! What a cherished place to be!
(Editor's Note: Or, click here to consult
our new page, "the name game" which
offers a gazillion unusual names from
which to choose!)
The Never-Ending Project
In future columns, I will be offering all kinds of projects
to fit this bear. Originally I called it the “Berry Bear
Pattern.” This pattern makes an 11” bear.
Keep the length of the mohair you use under 5/8”
long - not too dense - and think about color.
The highlight of my dressed bears is their clothing
so I tend to use a lot of neutral, soft colors of mohair
to allow the vintage accents to take center stage.
Next issue will be underwear! Get working on your bear!

|

|
1. Pieces laid out on fabric |
2. Shaved head pieces |

|

|
3. Pieces cut from fabric. |
4. Body parts sewn together |

|

|
5. Foot pads, head gusset seam sewn |
6. Body parts turned and brushed |

|

|
7. Ready for jointing |
8. The jointed body |
 |
 |
9. Placing the eyes |
10. Attaching the ears |

|
|
11. Finishing the head |
12. Voila! The finished bear |
General Directions:
1. Lay out pattern following the directions on the pattern pieces.
Cut just outside the line. ¼” seam allowances are included on all pieces.
Trim the fur off the shaded areas on
gusset and head sides either with
scissors or electric shears.
Pin body’s right sides together (rst),
legs rst, head rst, fold ears in half
and pin rst and pin paw pads to inner
arms.
Sew body as indicated leaving opening
as marked.
Sew paw pads to inner arms then pin
outer arms to inner arms and sew as indicated leaving opening.
Sew legs as shown leaving an opening
at back of leg and bottom of foot.
Pin foot pad to opening. Baste in place,
then sew around.
Sew ears all the way around, slash
across fold as indicated. Turn and
brush fur from seams.
Sew head from point A to point B. Pin gusset from point C to A to C. Baste in place!
2. Then, sew carefully.
Turn all pieces after clipping curves, then brush mohair out of seams.
Stuff head firmly from nose out.
Load cotter pin with washer and disc
for head.
Insert into neck, sew a running stitch
around neck opening, pull tightly around cotton pin and fasten off.
Insert cotter pin into body as indicated. Slide disc
on inside body. Separate cotter pin with pliers and
curl down.
Load machine screw with washer and leg disc. Insert
intotop of each leg.
Insert screw through body as marked, slide on disc
inside body, and screw on a lock nut.
Load machine screws with washer and arm disc and
insert into arm.
Insert screw through body as marked. Slide on disc
inside body. Screw on a lock nut.
3. Tighten screws so limbs move but are tight. Now
start stuffing!
4. Pour pellets into lower body for weight and stability.
Stuff body tightly with fiberfill. Close opening with ladder
stitch.
Stuff arms and legs, stuffing tips very hard working
towards top. Close with ladder stitch.
5. Face: the focal point of any bear.
With this pattern I always start with the eyes. They
are set between the seams on the gusset.
Soft sculpture between the eyes a bit to form a nose
bridge and pulling the eyes together. Stitch back and
forth between the eye holes.
6. Nose: Cut from black felt the nose pattern.
Glue over the gusset seam in place using black perle
cotton do a satin stitch over the felt pad. End with
an inverted V for the mouth.
7. Ears: Starting just north of the eye, pin ears in place
cupping them around to side of the head.
Refer to photo above. Stitch in place using a ladder stitch.
She is complete!
Materials:
-
1/8 yard mohair- 5/8” or shorter
-
Thread to match
-
4” x 4” piece of felt
-
(4) hex head machine screws
-
(4) lock nuts5 washers
-
(1) 1-½” cotter pinblack perle cotton
-
(2) 6mm black glass eyes
-
Firm pack polyfill
-
Optional: glass pellets or BB’s
-
(4) 1-½” hardboard discs for legs
-
(4) 1-½” hardboard discs for arms
-
(2) 1” hardboard discs from head
Tools:
|

 3428 Hillvale Road