|
Hooked on Felting Part 1
 |
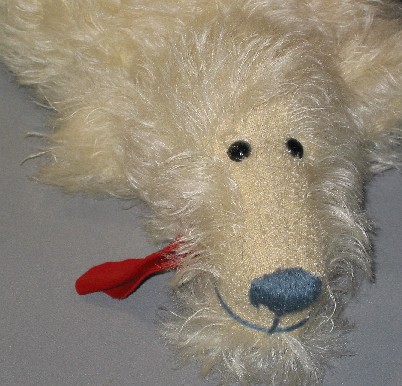
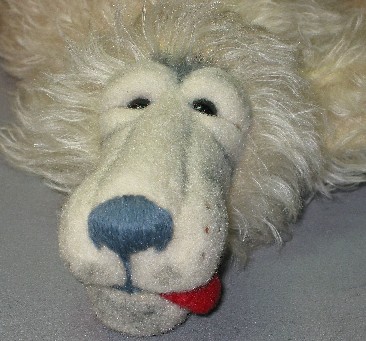
Funky
My first needle felted bear “Funky”.
|
By Neysa A. Phillippi
Needle felting is the latest craze in the ted dy bear world. Felting in one form
or another has been around since the cave man first put mammoth wool in his foot coverings.
Moisture from his feet and the friction
of walking “felted” the wool, which then became a great padding that was water repellent and warm.
“Wet felting” is the process of moisture
or water, friction and heat. When wet felting, wool is worked until the natural “barbs” in the wool open and lock, “felting” the wool fibers together.
I personally have been needle felting since July 2003. After 21 years making bears and other animals, felting has consumed me but has been a refreshing
change.
 |
Ike before felting |
 |
Ike during felting |
|
Ike after felting |
|
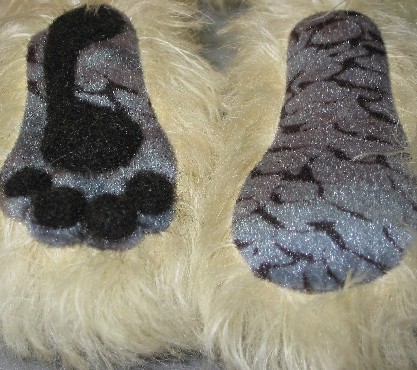
Ike’s foot pads |
|
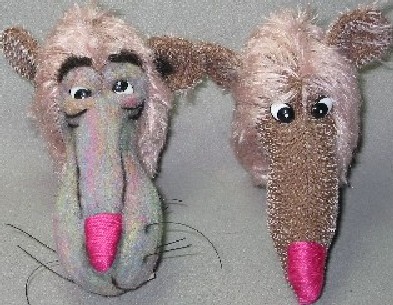
“Duddy the Rat” mohair/felted head |
|
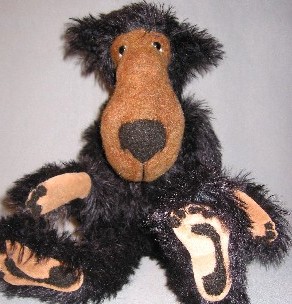
“Bart” Example of mohair with felting
|
Sewing bears 14 hours a day, seven days a week
for 20 plus years, tends to get old. I love creating and so much sewing limited my creative time.
When I became a teddy bear artist, I thought that
I had realized my dream of being what I wanted
to be when I grew up. Needle felting and writing have pushed me beyond what I thought was the limit of my abilities.
My passion for needle felting began when Becca Bednarz, Maplewood’s Treasures, gave me one
little wad of black wool batt.
Thanks to Becca, I have a fresh new outlook on life
in the bear making world.
I will cover a few aspects of felting per issue in my Hooked on Felting column. Questions, comments
and your input are welcome.
Needle felting is like sculpting with clay. Each piece
I create is a one-of-a-kind and allows my creative mind to run wild.
One creation leads to another, and improvement
in techniques and designs progress rapidly for me.
I only wish I had more hours in the day.
I have also realized that felting the faces and paw pads of my mohair critters, adds more life to the animals I create from materials other than felt.
Needle felting in the form I am writing about is “dry” felting. I find this form of felting, much cleaner and the felting itself, more intense than wet felting.
The critters I felt, are two to four inches, and take about eight to 10 hours per critter.
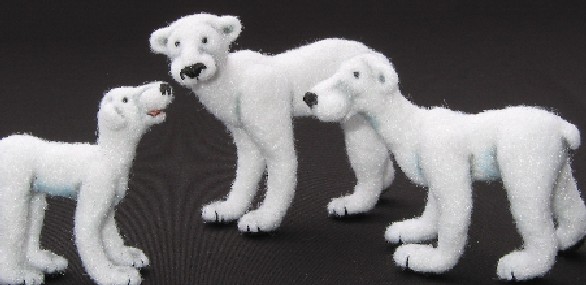
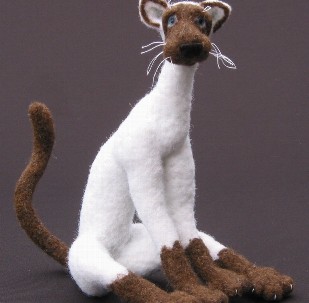
The Siamese cat pictured below, is seven inches
tall and took 36 hours to needle felt. That is
intense, especially when you get addicted to it
and work for eight or more hours straight.
 |
 |
“An Indy Cat”
|
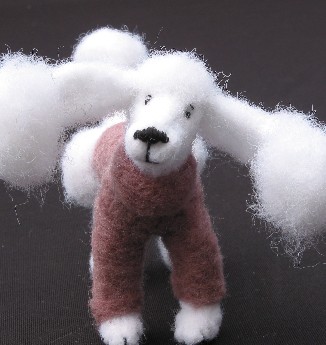
“Noodle Poodle”
|
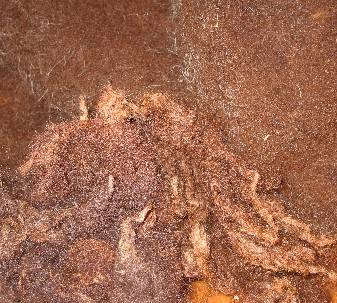
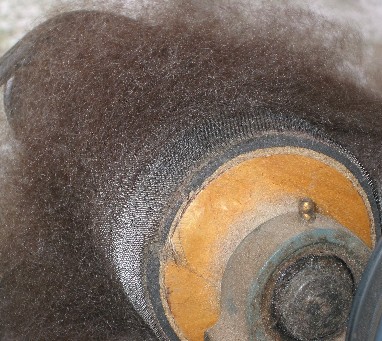
Felting is sculpting using wool batt or roving. Batt
is cleaned and carded wool; with the wool fibers
going in all directions. Roving is basically one step beyond wool batt; it is carded until all the fibers
are going in one direction. Roving is more often
used when spinning.
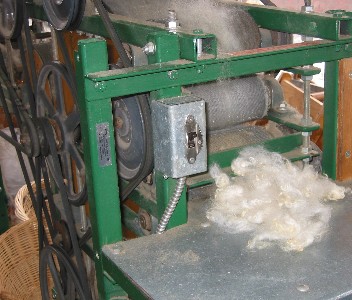
Carding takes place after the wool is washed and
is either accomplished with a carding machine,
 |
Batt sample |

|
Roving sample |
drum or hand carders. Cleaned and carded wool
is readily available.
 |
Hand carding with dog brushes |
 |
Fiber being fed into
carding machine |
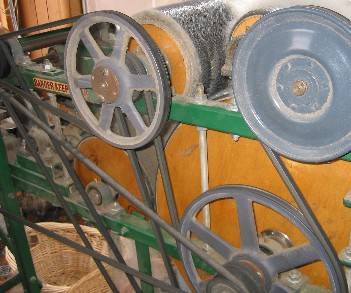 |
Fiber running through the carding machine |
 |
Carding unit |
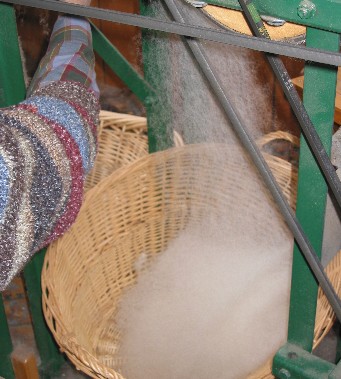 |
End product of the carding process |
If you want to card small lots
of wool, try using two metal
dog brushes, to work the
fibers back and forth, mixing them together.
Carding machines and even hand carders are a bit pricey, but with a carding machine, drum carders or hand carders you can mix different colors or
wools together to create your
own blend.
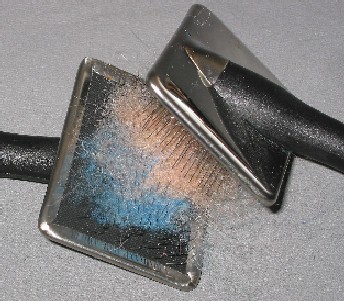
Felting needles come in many sizes, many more than are used in this form of felting.
Industrial felting looms use thousands of needles on a needle board. In dry felting,
 |
Barb or notch on needle shaft |
| |
 |
Felting needle edges |
one needle is the norm.
Felting needles are straight
with barb cut along the
needle's shaft; they are
made of high gauge steel
and are sharp but brittle if
bent.
“Barbs” are cut along the needle's shaft. When the needle is poked or pushed
into the wool, the barbs pull the fibers down, locking or hooking them together.
Wool has natural “barbs” and needling it locks it together more quickly.
The felting needle’s barbs
are cut in one direction so that felting of the fibers will occur when the needle is pushed in and not when it is pulled out.
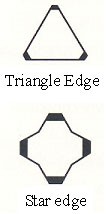
Felting needles have multiple
sides or edges; they are either triangle- or star- shaped.
The barbs on the sides of the needle push or condense to reduce the mass of wool batt, roving or polyester fiber into itself. Yes, you can even felt polyester stuffing.
The wool batting or roving will lock together and hold the fiber firmly
in place. It is almost impossible to pull the felting apart.
“T” or Triangle is the shape of the needle's tip; this needle has three
edges or sides that are flat on the shaft end in a triangular shape.
The other type of felting needle is the “S” or Star-shaped tip, which
has four edges or sides and a concave groove between the four edges.
It also has more barbs than the triangle and “needles” faster.
Felting needles are sized or gauged by the thickness and shape of the
needle - the lower the needles number the thicker the needle and the
larger the holes in the felted surface. Alternatively, the higher the needle number the finer the needle or the smaller the hole it leaves in your
creature.
Lower numbers are for the beginning
stages of felting when you are compressing and shaping the fiber. Higher nimbers for finishing - the
fine detailing at the end of construction.
The most common needles are 36 Triangle, 36 Star, 38 Triangle, 38 Star, 40 Triangle, and 42 Triangle.
36 triangle, 36 star - a beginning needle used when starting your
project.
38 triangle, 38 star - good for detail work
40 triangle - good for fine detail work, creating a smooth surface
for your project
42 triangle - good for very fine detail and a very smooth surface,
but I believe this needle is optional for some projects.
Once hooked on felting, (believe me, once you start felting, you will
get hooked!), you may want to use a Sculpey, Fimo or Crayola Model
Magic to create a knob on the top of your needle (over the Allen key
L-shape called the "crank"). This will make the needle more comfortable
when holding it for long periods.
Wood and metal needle holders are readily available, but it is much
less expensive to use Crayola Model Magic.
When you break a needle, simple work the needle out of the modeling
clay and insert a new one, adding a touch of Elmer’s Glue and drying it,
point end up.
Once the glue sets, you can start felting again. If using Sculpey or Fimo,
you also have to replace the knob when you break a needle because
Sculpey and Fimo need to be baked in your oven.
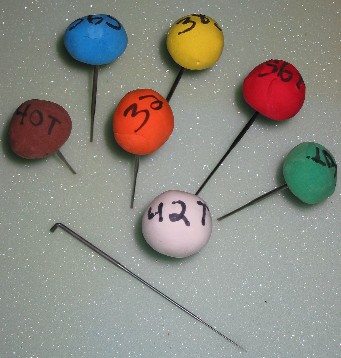 |
Needles pictured with Sculpey heads, and one as purchased |
I keep several sets of needles, with Crayola Model Magic knobs, handy so that I can continue felting even if I break a needle.
Bobbie Ripperger, recommended I use Crayola Model Magic, which has a spongy feel when
it dries - not hard like Sculpey or Fimo.
I purchase a Deluxe Variety Pack containing nine colors, which is more reasonable than buying the colors separately.
I then label the knob with permanent markers as 36 T, 36 S, 38 T, 38 S...etc. Another option is to purchase one color of Crayola Magic, Sculpey or Fimo and label the knobs with permanent black marker.
Personally, I find reaching for a color is easier than reading needle tops.
Mine are also numbered but after working with them for a while, you recognize the needle by color.
Tools are available that hold one or several needles. I have not found
one yet that meets my needs.
WORDS OF CAUTION: please keep felting needles out of reach of children
and pets. NEVER put a needle down and just leave it. Put it back in its envelope or in a sealed container. ALWAYS put needles away, particularly
if you have children or pets. It only takes one second for a child or pet,
to grab the needle and injure themselves.
Needle felting requires your undivided attention, especially where your
fingers and eyes are concerned. The needles are made of highly tempered steel, which means they are very sharp and brittle.
Needle in and out in a straight line. Never bend the needle or use it
to pick or pry with, such as to pick out straw that is in the wool - the
needle will snap.
When you break a needle and you
will, ALWAYS find the pieces and discard
them! Wearing glasses or goggles is
a good idea.
Think about updating your tetanus shot
next time you visit the doctor since you
are working with highly tempered steel
and natural wool fibers.
45 Gorman Avenue
Indiana, PA 15701-2244 USA
Please direct comments on this article to: neysa@purelyneysa.com
Part 2 and Part 3
Home • Contact Us • Join Bears&Buds
|

 3428 Hillvale Road