Some tried and true tips for successful photography.
Eyes are Everything!
Most editorial submissions and major contests are judged on photographs and the first thing most of the people in charge of each of those, judge, is the eyes.
The eyes must grab you and say, "adopt me" or "pick me". So, when you shoot your piece, get down at eye level, parallel with your bear's eyes so you can catch the expression on its face.
We receive photos each month where we cannot see the eyes clearly and most often, the head is turned sideways so the eyes are not even looking at you.
You can tilt your piece's head but those eyes still need to be looking into the camera or if they are looking off into the distance, you have to be able to see the expression.
The expression has to make you want to reach out and turn the head towards you so you can get a better look.
It is usually best, however, if the bear is looking back at you, into the camera lens because then it will appear to be looking out at the reader. |
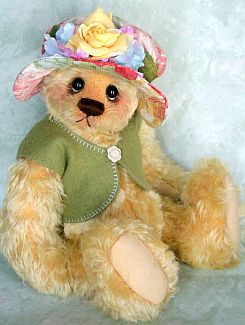
Bear-All
Little Miss Flora
Three 'O Clock Bears
Jenny Johnson
|
Mick
púca Bears
Maria Collin
|
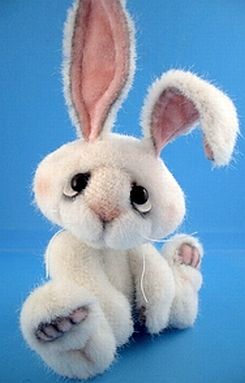
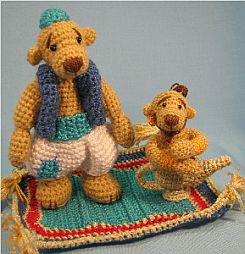
Posing
Move your piece at least 12" away from your backdrop to avoid shadows and provide depth in your photos.
Look at the poses in the photos shown on this page, for examples of how to pose your work and the angles to use.
Avoid having your piece seated with the legs spread out on each side since this creates a distorted-looking, squatty appearance.
An easy way to get your bear to "stand up" is to slip a thin sheet of styrofoam
under your "floor" and push pins up from the bottom, into your bear's feet.
|
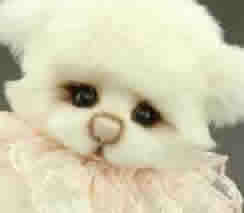
Manicure
Before shooting your photos, take a few extra minutes to "groom" your bear. Use a small brush or comb to tame those wild hairs that stick out like sore thumbs when the photo is processed.
This is particularly necessary for thread and needle felted creatures. If you don't tame these stray threads, your piece looks messy and has no definition. Photography is not kind to the "natural" look.
Hide those distracting price tags/labels and trim stray threads on fabrics and buttons.
|
 |
Tammy Lynn Martin
|
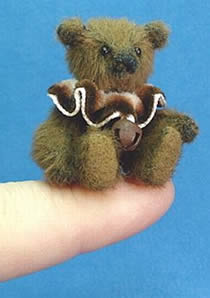
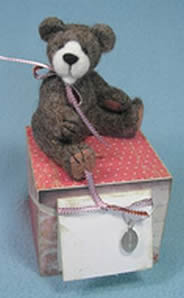
Demonstrating Size
Many miniature bear artists, shoot their photos with tons of space around the piece in order to demonstrate the small size of their piece.
Unfortunately, this tactic has a negative side effect - the viewer of your photo is unable to see the piece clearly, or determine the size and often loses interest in it and moves onto another photo.
The other technique that some artists use, is to hold the piece in their hands or with their finger tips.
|
Since the eye is first drawn to anything human, the eye goes to the hand first before the piece itself. Additionally, hands have many lines and lines always lead the eye off the page.
Instead, get creative and integrate a thimble, spool, ruler, coin or some other object into the photo to help indicate size.
But one must wonder how Tammy makes such small bears that they can perch on her finger! The photo on the left demonstrates that sometimes fingers/hands can be effective. |
Backgrounds
Cluttered backgrounds or wrinkled backdrops (use your iron), are not suitable for publication, so be sure to retake any such photos before submission.
Your choice of background color and type can make or break your photos.
Contrasting, non textured, even colored backgrounds are best. Avoid backgrounds too close in color to your piece and those with dingy undertones. Colors should be crisp and clear.
If you use a background too similar in color to your piece, your work will blend into the background and will assume a flattened appearance with no depth.
We recommend against using black or textured backgrounds since they absorb light, resulting in two-dimensional, flattening, effects.
It takes a very highly skilled photographer to fully grasp the technical and lighting needs for such backgrounds.
|
Chantal Giroux
Chantal's Bears Collection

Mary Wimberley
Mary's Secret Garden
|
Please avoid special effects with your backgrounds like cutouts of your photos where you drop out the background.
Cropping around you work to achieve this effect, creates a flattening effect and removes any depth your photo may have had.
We discourage the use of frames, circles, or other fancy effects.
Whatever background you use, be sure the background extends above, below, and to both sides of your bear with no bare spots. |
Scenery
While outdoor settings can help you with lighting, natural elements such as
foilage, rocks, trees, can steal the stage and prove distracting, moving attention away from the piece rather than contributing to the overall impact.
Most major competitions do not allow you to submit photos involving outdoor
or other scenery and plain background are a must!
If you choose to shoot in outdoor or natural settings, please make sure your bear, not the setting, is the focus of the photo. |
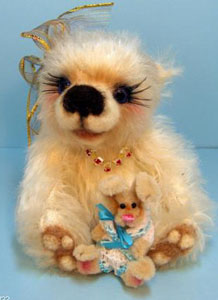
Heather Hamilton
Heather's Hugables
|
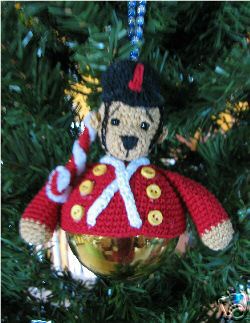
 Bettina Groh
Glass Dragon Teddy Bears
|
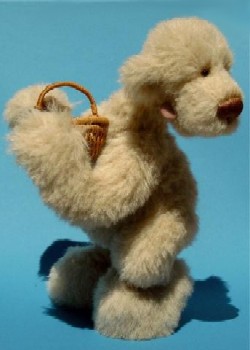
Props
Use accessories sparingly, unless you are creating a vignette or room-box.
A good rule is: If you aren't planning on selling the prop with the bear, do not include it with your photo.
Simple, uncluttered photos are best and and show off your work to its best advantage.
|
Achieving Focus
The subject of your photograph must be in sharp focus. Blurry photos will look even worse when enlarged.
To achieve sharp images, the camera must be focused accurately and held steady.
It helps to take a deep breath and be sure to hold the camera firmly. Or purchase a small tripod.
If you are using an auto-focus camera, remember that items closer than three feet tend to blur.
Rather than trying to focus everything in your photograph, concentrate on your subject's face. Make sure that the whole face is sharply focused even if the background blurs slightly.
Don't use your camera's Zoom feature because it often creates strange optical distortions. |
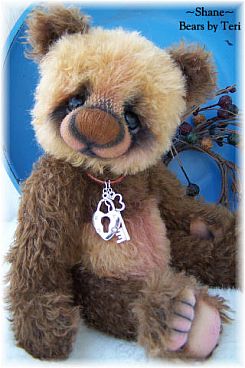
Teri Crews
Bears by Teri
Please no text in the photos you submit for publication.
|
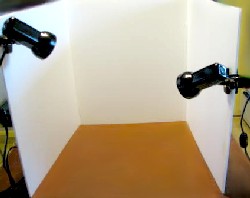
Heather's Photo Tri-Fold
Simple corrugated plastic,
16" high x 18" wide per panel. The clipon lights are from Walmart - affordable,
lightweight with Full sprectrum photographers bulbs. JoAnne's Fabrics has True Color bulbs.
Note the focus is on the bears and the background fades into the back.
For more detailed tips on lighting, see the articles on these links:
Lamps and Lighting
Photographing Teddy - Part One
Photographing Teddy - Part Two |
Affordable Light Tent
Lighting can make or break your photos. You need as much light as possible, on your subject, If you want an inexpensive "light tent" so you can get more light reflected on your pieces, go to your local craft store and purchase a stock poster board. Look for one of the new white corrugated plastic tri-fold substitutes for poster board (24"-36" high and each sheet should be 24" wide) that you can use for a "light tent". Each tri-fold is only about $4.00.
If you work with bears larger than 12" high, buy two tri-folds and tape one to the top end of the other so you have an even higher tri-fold.
Fold it open to resemble a tri-fold mirror, when you are r eady to shoot your work.
Use regular cardboard poster board in a color which contrasts to the color of your piece, as the backdrop and "floor". But, be sure to position the poster board so you have at least 12" of tri-fold white space above the poster board.
The white remaining surface of the tri-fold then reflects light back on the subject.
It is imperative to light your bear properly. Suggest you do not use the flash feature on your camera, which cause harsh shadows. |
When photographing in natural light, avoid bright sunlight for the same reason. An overcast day is perfect for natural light.
For lighting, use side lights as well as front lighting so your bear stands out from the background
Sometimes you can stumbled across a tri-fold light tent in yard sales, flea markets or even eBay.
|
Camera Tips
READ THE INSTRUCTION BOOKLET that came with your camera! It is THE most important tool in your bear making arsenal.
Not reading your instruction booklet is kind of like a surgeon not reading how to operate a laser and just winging it. That is how important your camera should be to you! The more your read your instruction book, the more tips you'll understand and use.
Remember, unless you sell at teddy bear shows, your photos are the only visual reference that potential collectors will have when evaluating whether they will buy your work.
Use your camera's factory settings. Learn where the Macro setting is on your cameras and how and why you should use it.
Learn how to use your light settings on your camera, if you have this feature.
Resizing Photos
Almost every computer comes with some kind of digital photo editing software - any of which can be used quickly and easily.
When do you need to resize?
Whenever you send a digital photo to someone with dial-up internet service, your photo should be no larger than 1200 pixels x 1600 pixels, or you will
clog up their email. Some software has a feature "publish to web" and that will give good resolution for easy and fast transmitting.
Bears&Buds Online Teddy Bear Magazine
Photo Submissions
Only Bears&Buds Professional Members may submit photos for consideration to be featured in the monthly What's New section. No business names or company logos on the photos.
Email all submissions along with 75 word or less descriptions to bearsandbuds@aol.com. The Editor has the right to correct definitions and submission texts.
Please one photo with description in each eMail with the subject line being the name of the bear/bud.
Save photos in JPG format, 72 or 300 dpi resolution and sized 4x6.
Label each photo with your business name followed by the name of the item. (Example: mycompany-cutiepie.jpg) (limit 18-20 letters with no symbols or spaces)
We prefer new creations that have not run in any other media but do not hold this rule firm. Please do not resubmit photos published in past issues of Bears&Buds.
|

 3428 Hillvale Road